
We make the first soap - a simple recipe for everyone
Don't be!
Your first soap is an entry into the world of soap making , and if you start experimenting gradually, you will avoid unnecessary problems and worries. That's why we start with ordinary soap. This is also so that you can see how the oil and lye behave when we combine them together without being affected by other added components (both some dyes, essential oils and other additives can affect the behavior of the soap mass).
My first soap :) Everyone started somehow, the most important thing is to start somehow :)
Recipe for the first soap
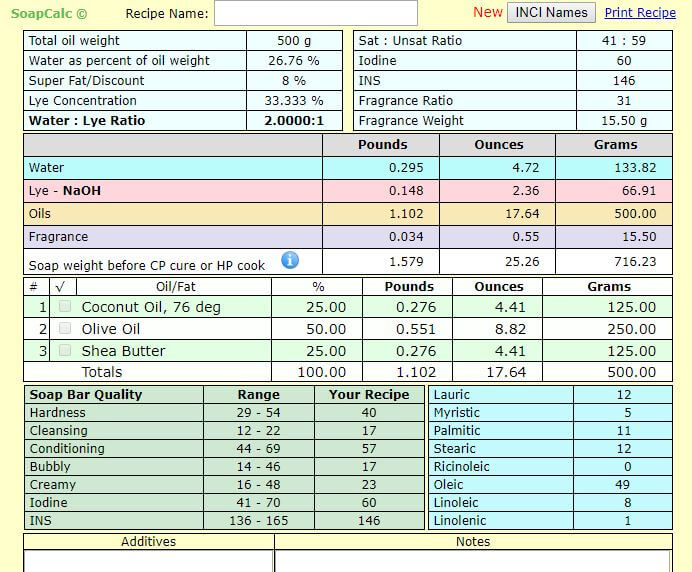
I therefore chose a basic, simple and functional recipe for the first soap. I give both percentages and specific weights for creating soap from half a kilo of oils (the result is roughly 700 grams of soap) . If you want to make a smaller or larger soap, you need to recalculate the recipe. You can read how to do this in the article on using the soap calculator here .
Recipe:
50% olive oil (250 grams) – takes excellent care of the skin
25% coconut oil (125 grams) – provides cleansing and plenty of foam
25% shea butter (125 grams) - thanks to it, the soap is durable and does not wash off easily
So we have 50% liquid oils and 50% solid oils.
We can use either virgin or pomace olive oil . With virgin, the soap will go into the trace very slowly and we cannot do without a mixer (which can be used later for patterned soaps). Pomace, on the other hand, reacts willingly and the soap can thus be mixed even without using a mixer. Choose which one suits you, there is no wrong choice and it really depends on you.
The soap production process is described in detail in the article on cold soap production. I will ask you to read it (perhaps several times in a row :)), it will help you clarify a lot of things and give you detailed instructions on how to do it.
Since each oil has a different saponification value, we must always recalculate the recipe when changing the oil or quantity . I recommend recalculating even recipes that you can find on the Internet. You never know if the person in question has not written in the recipe - the result could be a dangerous soap and nobody wants that. Certainty is certain.
So if you want to learn how to work with a calculator, you can here - How to master the soap calculator.
But back to our soap. I chose 8% fattening and water in a ratio of 2:1 with hydroxide. Fat content is a value that tells us how many percentages of fatty acids remain in the soap after the saponification (saponification) process. The overfatting indicates the amount of oil that remains in the soap after the hydroxide reacts. It cares for the skin and prevents it from drying out.
Where to get hydroxide? Be sure to forget the hydroxide from the drugstore, you need to use high-quality soap for cosmetic production. You can buy such in stores with cosmetic ingredients. The ones from the drugstore are of poor quality and not very concentrated, you can spoil the whole soap with them.
SAFETY
Attention! Hydroxide is a strong corrosive. In case of skin contact, immediately rinse with plenty of cold water. In case of eye contact, rinse with water and call for medical help immediately!
There is no need to be afraid of lye. Just respect and be aware of its dangerousness. If all safety rules are followed - gloves, goggles and suitable clothing - the risk of contamination is relatively small.
Workflow
We will prepare everything necessary and banish pets, children, spouses and the like from the work area. You just need to be absolutely calm for the first soap.
We will put on protective equipment - glasses and gloves , put on long pants and a long-sleeved T-shirt.
In one container (stainless steel or plastic - heat-resistant, we never use glass! ), we take the necessary amount of demineralized or distilled water, in the other container we take hydroxide.
Then slowly pour the hydroxide into the water. Never the other way around , a violent reaction and injury may occur! During dissolution, vapors are released that must not be inhaled . So open the window, turn your face away from the bowl, slowly pour the hydroxide into the water, stir and go into the next room for a while. Dissolving hydroxide in water releases a lot of heat and the solution can reach 90°C, so be careful.
Once the hydroxide is fully dissolved, let it cool in a safe place.
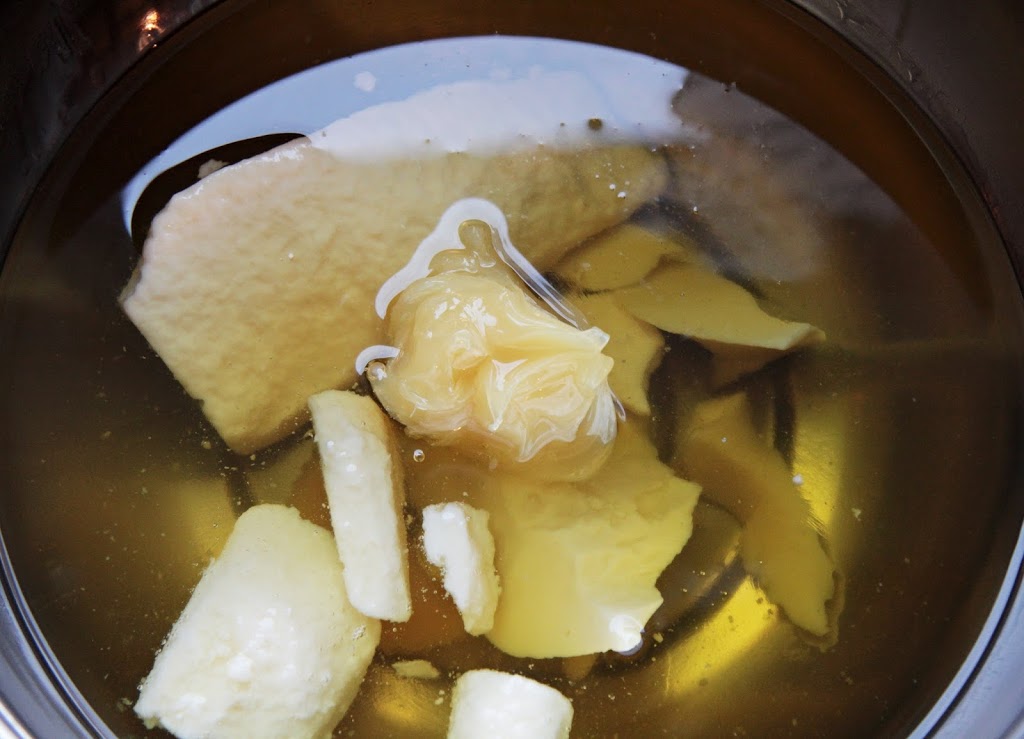
While the lye cools , we remove the fats . Add solid fats (bamboo butter and coconut oil) to one bowl and melt them over a water bath. And in the second place we take liquid oils (in this recipe it is olive oil).
Before the solid fats dissolve, we will prepare a mold . The form can be plastic (suitable for the oven) or silicone. I use wooden ones, but you need to line them with baking paper beforehand ( in advance! Then there won't be time :) . Molds can be purchased online, or you can purchase a heat-resistant plastic or silicone mold at a home improvement store. It doesn't matter much about the shape, mainly that the soap fits into the mold and can be easily removed from it.
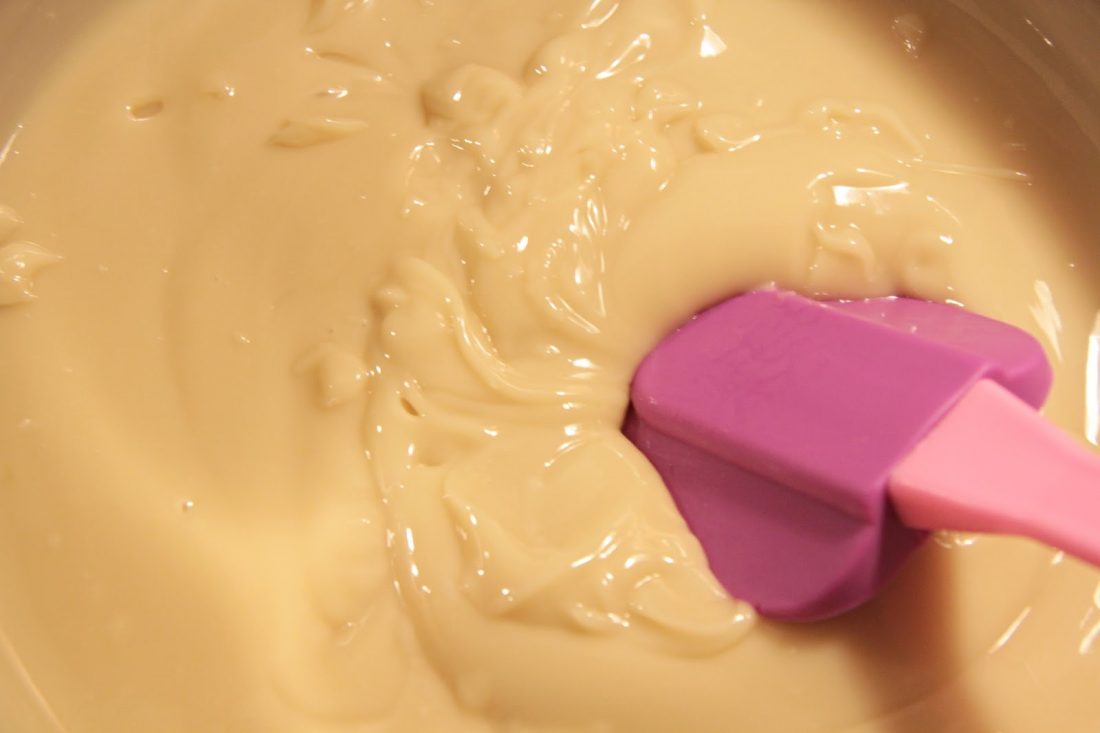
As soon as the temperature of the oils and hydroxide has dropped to approx. 36-38°C (the lye must always be a few degrees higher than the oils), slowly pour the hydroxide solution into the oils . We first mix with a spatula and observe what happens to the mass. Then we take the stick blender and mix carefully on the lowest setting for a few seconds. We mix the mass with a spatula and watch how it changed. We continue like this until we see a so-called trace on the surface of the soap.
How to know the right track? If we pick up some of the material on the spatula and let it fall back into the bowl, a small ripple will form on the surface for a moment before it joins the rest of the material . At this point, we have a homogeneous mass that is ready to be poured into a mold. If the track is still not visible , you need to continue mixing.
Take your time. Observe how the soap behaves and how the substance changes - color, density, consistency. This is one of the most important parts of soap making and should not be neglected.
Once we have a trace , we can pour the soap mass into the prepared form . Pour everything out, if necessary, spread out the bowl. Now we just have to make sure that the oils and lye react together and we get soap :)
Here are several options on how to proceed . We can put the soap in the oven at 55°C for about 2 hours and then leave it in the oven until it cools down (here you have to be sure that the oven will maintain this temperature and not go up on its own - the soap could overheat). The second option is to wrap the mold with soap in a blanket and put it, for example, near a radiator for 24 hours. Soap needs heat for the so-called gel phase to take place, during which most of the hydroxide reacts and soap is formed.
Both options are fine, it depends on how eager you are for your creation :)
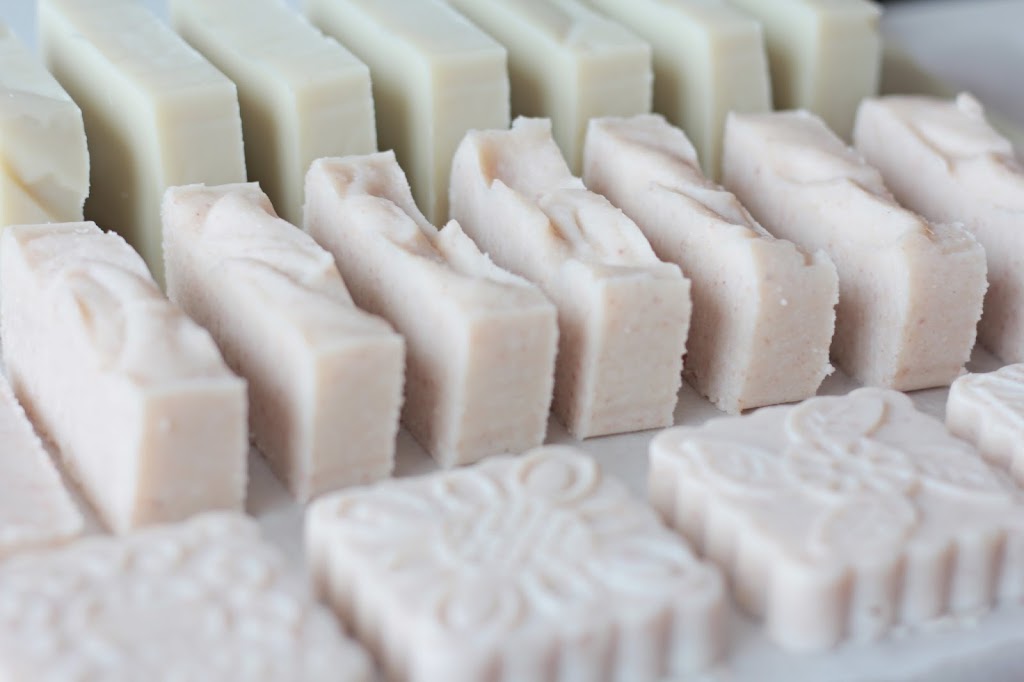
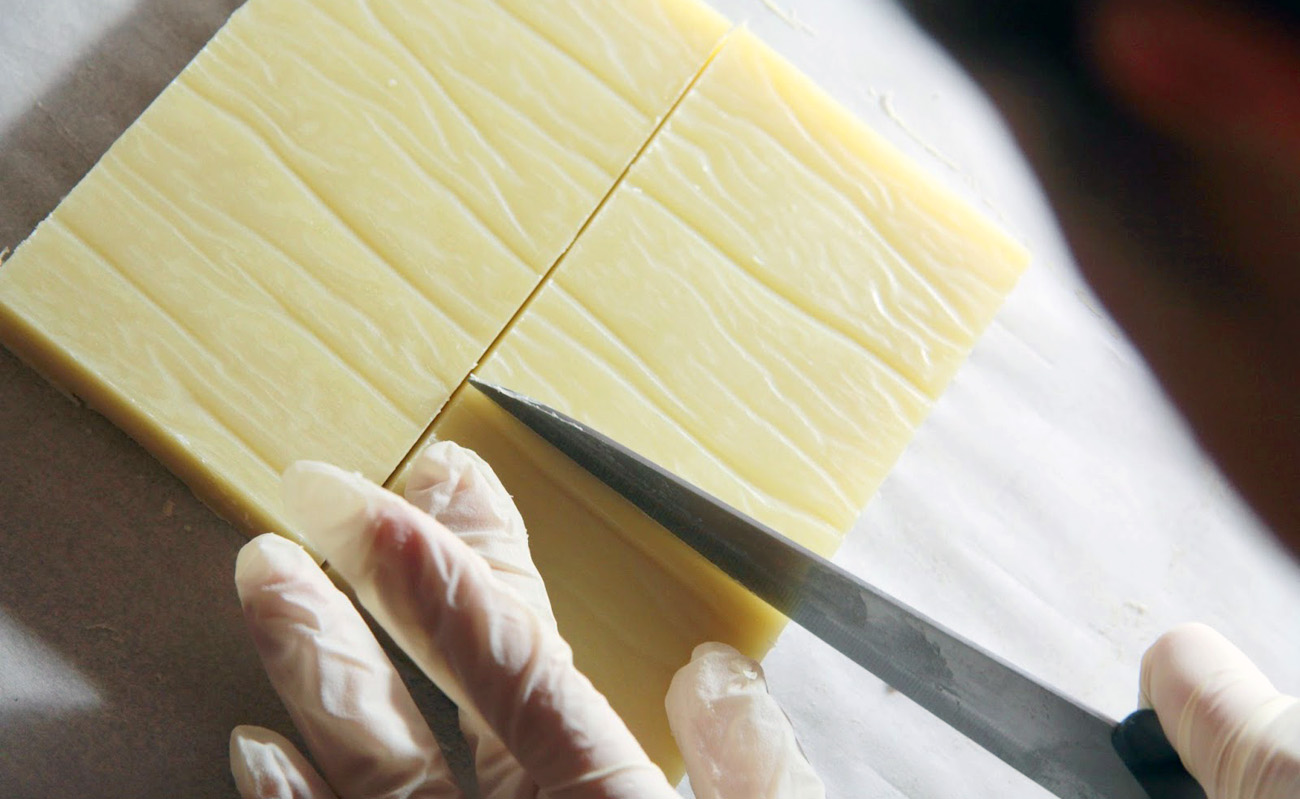
Then all you have to do is cut it (you can use a knife, a spatula or you can make your own soap cutter according to our article) and let the soap mature in a dry and well-ventilated place for several weeks . The minimum is 3 weeks and for our first soap this time should be enough, but the older the soap, the better its properties. During maturation, the soap loses water and a so-called crystalline lattice is formed. Thanks to aging, the soap is gentler and, above all, lasts longer - it just doesn't lather up.
It is a good idea to check the pH of the soap with litmus papers that you can buy at the pharmacy before use . The value of the measured pH of the soap produced in this way should be 8 – 10. You can find out how to check the soap in this article , where there are also other methods of checking the soap.
And we're done! Now you have to wait at least the 3 weeks...at least because the older the soap, the better its properties. Soaps start to be really pleasant from 3 months. But who could stand it in the beginning? :)))
Congratulations on your first soap and I wish you more beautiful soap making :)
Don't forget to brag about your result in our Facebook group about the production of natural cosmetics !
................................................... ................................................... ................................................... ................................................... ...................
To Zdenička and Peter, who are behind the beautiful initiative Directly from the beekeeper , we would like to thank you very much for the possibility of cooperation and the possibility of sharing the article! If you don't know this clever couple yet, definitely fix it and follow not only their blog , e-shop , but also social networks - Facebook and Instagram .
It's worth it!
You can find the original article here: https://blog.primoodvcelarky.cz/2018/10/delame-prvni-mydlo-jenzidowy-recept-pro-kazdeho.html